
A mysterious purple plague is killing the kingdom of Nyvarith — and the queen has seven days to live. The cure requires four rare ingredients scattered across swamp, forest, ruin, and bandit hideout, but the Covenant of the Amaranthine Shroud is actively working to ensure none of them reach the castle in time.
Welcome to “The Plague of the Queen” 5E adventure! Within these pages, you’ll discover everything necessary to embark on this thrilling quest, complete with detailed descriptions of locations, encounters, NPCs and stat blocks, maps, and handouts.
This adventure also features a versatile and scalable system, allowing Game Masters to easily adjust the difficulty and complexity of encounters to suit their players’ preferences and skill levels. Whether you have a party of advanced players or beginners, you can tailor the challenges to ensure an exciting and engaging experience for everyone involved. The scalable system guides modifying creature statistics, making it simple to customize the adventure to fit your party’s level.
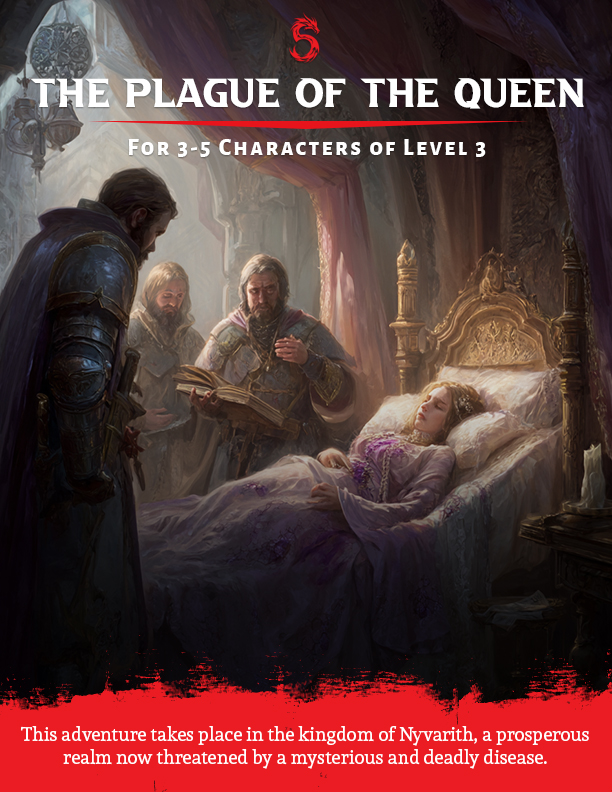
In “The Plague of the Queen,” a party of 3-5 characters (level 3) is summoned by King Tharomir of Nyvarith to find a cure for Queen Vesrielle before a spreading plague claims her life. Court wizard Magister Vaelus has identified four rare ingredients from an ancient text: the luminous cap of a Murkmire mushroom, dried Silverleaf herb leaves, nectar of the Moonbloom flower, and water from the sacred spring of the Temple of Renewal. Unknown to the king, the disease is not natural — it was created and released by the Covenant of the Amaranthine Shroud, led by Lady Meredith Blackthorn, a disgraced former royal advisor who seeks the throne. The cult is actively intercepting each ingredient to stop the cure. A seven-day countdown tracks the queen’s survival, with each major location taking roughly one day to explore. The adventure is divided into five acts.
Act 1: The Royal Castle
King Tharomir receives the party in Nyvarith’s throne room, flanked by Magister Vaelus and royal physician Dr. Sylphine Mistwell. He briefs them on the queen’s worsening condition, the four ingredient locations, and the 500 gp reward per character — plus the title of “Royal Savior” and a castle-access medallion — for returning in time. The party departs with a royal writ, a kingdom map, basic supplies, a potion of healing per character, and Magister Vaelus’s quiet warning that dark magic may lie behind the plague.
Act 2: The Murkmire Swamp
The first ingredient grows in the Gloomfen, the darkest reach of the Murkmire Swamp. Swamp hermit Griswold — found at his stilted hut after a DC 14 Survival check or random encounters with giant frogs, constrictor snakes, or stirges — knows the way and will guide the party to the Gloomfen’s edge for 10 gp or in exchange for a vial of sacred spring water. He warns of three hazards: a Stirge Nest that can be sneaked past by day (DC 12 Stealth), Quicksand disguised as solid ground (DC 15 Perception to spot, DC 12 Strength to escape), and the Gloomfen itself where three giant toads guard the glowing mushroom island. Searching the island after the toads are dealt with yields torn purple fabric bearing an embroidered Amaranthine Shroud symbol — the first hint of the cult’s involvement.
Act 3: The Bandit Hideout
The Silverleaf herb was stolen from a merchant caravan by Darius Blackhand’s gang. In the town of Riverdale, Captain Eliza Stormwind confirms the bandits are holed up in an abandoned lumber mill north of town, and wounded merchant Tomas Greenfield notes the bandits specifically asked for the herb by name. Tracker Renna Swiftfoot can lead the party to the mill for 10 gp. The mill’s exterior is patrolled by two bandits on a 10-minute circuit; forcing the barred doors alerts everyone inside. The Main Floor holds four bandits and an alarm tripwire at the entrance. The Storage Room holds the herb among stolen goods (DC 12 Investigation) plus a hidden coded message (DC 15 Investigation, DC 14 Intelligence to decode): a note signed “M” instructing Darius to keep the herb from the castle and confirming the queen’s illness “progresses as planned.” On the Upper Floor, bandit captain Darius Blackhand and his lieutenant Grak can be intimidated (DC 14) or persuaded (DC 16) into revealing they were hired by a purple-robed woman with an Amaranthine Shroud brooch, and that his final payment drop is at a stone circle at the edge of the Whispering Woods.
Act 4: The Whispering Woods
The Moonbloom flower blooms only under the full moon in a clearing at the heart of the Whispering Woods. Three successful DC 14 Survival navigation checks are required to reach it; failures trigger random encounters from a six-entry table including specters taking the forms of lost loved ones, awakened trees, wandering zombies, and disorienting mist that separates the party. Four key locations reward thorough exploration. The Wailing Hollow is haunted by banshee Morvenna, bound to a weeping stone statue — she attacks if provoked but, if treated respectfully, offers to guide the party to the clearing in exchange for a promise: bring her a lock of the queen’s hair after she recovers. She also warns the Moonbloom Guardian requires a blood sacrifice. The Hanging Tree shrine rewards offerings of sentimental items with advantage on navigation checks and hides a journal with the Guardian’s full description and a flower sketch. The Moonbloom Clearing presents the Guardian of the Clearing, a ghost who demands one character willingly take 1d6 slashing damage by cutting their palm — force earns a ghost-and-specter fight. The Stone Circle is the cult’s payment drop site; waiting in ambush here captures Lydia Voss, a cult fanatic who (DC 14 Intimidation) confirms Lady Blackthorn created the disease and that the cult’s headquarters is inside the Temple of Renewal.
Act 5: The Temple of Renewal
The Temple of Renewal — once dedicated to Mara, goddess of healing — has been desecrated with plague symbols and overrun by the Covenant of the Amaranthine Shroud. Six mapped areas lead to the final confrontation. The Entrance Hall holds four cultists performing a desecration ritual around a defaced altar; cleansing the altar grants each character 1d8 temporary hit points. The Collapsed Corridor is unstable (DC 12 Acrobatics per character; failures trigger 2d6 debris damage and noise that alerts the next area). The Library holds three cultists researching plague enhancement and documents confirming the disease was deliberately engineered — a hidden passage behind a bookshelf (DC 15 Perception) leads directly to the inner sanctum. The Barracks houses five cultists and fanatic Orrin, who (DC 13 Intimidation) confirms Lady Blackthorn is in the inner sanctum and that the sacred spring has been corrupted. The Secret Passage offers a stealthy approach but hides a swinging-blade tripwire (DC 14 Dex save or 2d10 slashing damage). In the Inner Sanctum, Lady Meredith Blackthorn performs a ritual at a spring now bubbling with sickly purple plague-concentrate, flanked by four cultists. Defeating her is only the first step — the characters must also remove the dark crystal submerged in the pool and purify the water before collecting it. If reduced below half health, Lady Blackthorn flees through a concealed escape tunnel where, cornered at the exit, she drinks a Potion of Invulnerability and summons two shadows for her final stand.
With all four ingredients in hand, Magister Vaelus leads the party through a combination ritual requiring a DC 15 Arcana check — success cures the queen within hours; failure adds several days of recovery but she survives. Two outcomes follow: if Lady Blackthorn was captured or killed, King Tharomir orders her cult hunted down across the kingdom using the party’s gathered evidence; if she escaped, she remains at large as a future campaign hook. Rewards include 500 gp per character, the Royal Savior title and medallion, and the lasting friendship of King Tharomir, Magister Vaelus, Captain Stormwind, and the grateful citizens of Nyvarith.
Release Date: 2025
Format: Digital (PDF)
Items Included
- The Plague of the Queen 5E (PDF)
- A B&W Printer-Friendly Version (PDF)
- Maps
- Illustrations (Generated with Midjourney)
- Monster Stat Blocks
Leave a Reply